The first thing you want to do is create the classic vignette that the Lomos are well known for and I achieve this by doing a freehand lasso of a circle around the photo. It doesn’t need to be perfect and to prevent hard edges, I set the feather to 80-90px before creating the circle.
Once you have set the feather (shown above) and have drawn the circle, you must invert the selection. You can do this one of two ways. #1 Shift-Ctrl-I (Shift-cmd-I on the mac) or #2 Go to the menu Select>Inverse.
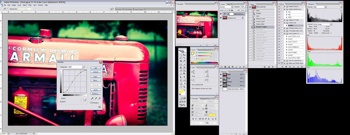
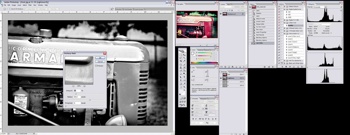
Now to achieve the vignette, I add a Levels layer. Note: I still have the invert selected.
This will add a masked out layer on top of your original layer. I then adjust the levels by moving the center arrow to the right. This will darken the edges, giving me a vignette. The amount is up to you and in this case I went from 1.00 to 0.50 on the center number highlighted in the image below.
Now you have a vignette.
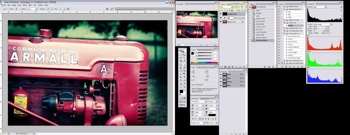
Another key to a Lomo picture is the color contrast and saturation. This occurs because people with real Lomos use color slide film and cross-process the film in C41 chemicals.
For those that don’t know what cross-processing is, it’s when you develop film in a chemical other then what it was made for. Standard 35mm film is usually processed in C41 chemicals and Color Slide film is usually processed in E6 chemicals. Interesting results happen when you mix and match.
Typically, Lomo owners will take color slide film (E6) and have it processed as standard 35mm film (C41). This results in over saturation of colors and at times some freaky results. All of which make Lomo as special as they are.
To get a digital photo to look Lomo, we need to fake the cross-processing effect (E6 film in C41 chemicals).
At this point I usually flatten the image using shift-ctrl-e (shift-cmd-e on the mac) or go to the menu and Layer>Merge Layers.
First, I add a curves layer and create a slanted S.
Then I create a new layer on top of the other two layers. I select the paint bucket and pick the color black and fill the new layer with solid black.
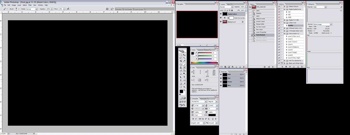
Then I change the blending mode and set it to Hue and reduce the opacity to 40%.
Sharpening and Saving
This has gotten us very close to be finished. Again, I flatten the photo by using shift-ctrl-e (shift-cmd-e on the mac) or go to the menu and Layer>Merge Layers.
Before saving the photo as a JPG, you need to sharpen the photo. I use the unsharp mask and Lab mode/lightness technique. The purpose of this step is that it adds more contrast and darkens some of the areas as well. Now you can use whatever sharpening technique you want, but the following method prevents the color halos that come with certain sharpening techniques.
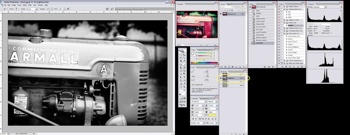
Go to Image>Mode>Lab Color. If you hadn’t flattened the image yet, it will ask you if want to flatten, please do so.
Then select your channel window and click on the lightness channel. The 3 other channels should deselect.
Then go to the menu, select Filter>Sharpen>Unsharp Mask.
I like sharpness, so I set the Amount to 50%, Radius to 50% and the Threshold to 0. Click Ok. This is completely up to you on the settings. Plus it will depend on the photo as well and use your best judgment/preference.
Go to Image>Mode> RGB Color. You do not have to reselect the unchecked channels, when converting back to RGB, the channels will automatically turn back on and the photo will go back to be in color.
Now you are done, save the file and share.
Final step, save as a Jpeg.
Before the Lomo Photography Look
After the Lomo Photography Look